Overview: scroll down for step-by-step w/screenshots
A thumb drive of any size can be used because this procedure installs an "image" of the original operating system onto the stick. Both the installation software and the "image" file must be downloaded before installation.
First download the "image" file g4img1gb.zip. This zip file contains a disk image of a drive that’s formatted with the new operating system. After downloading it, right-click it and select "Extract All" from the menu that pops up. It will create folder called g4img1gb in the same folder that contains g4img1gb.zip. In the new folder will be a file called g4img1gb.img. Be sure to note where your browser downloaded the file because you will need to navigate there from the installation software.
Next, download the Balena Etcher imaging software. Double-click it and follow the instructions that come up to install the program.
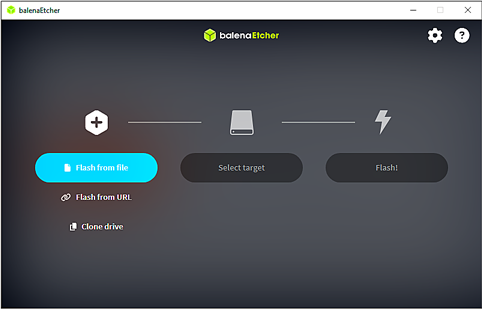
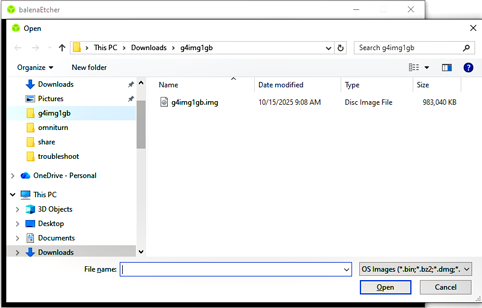
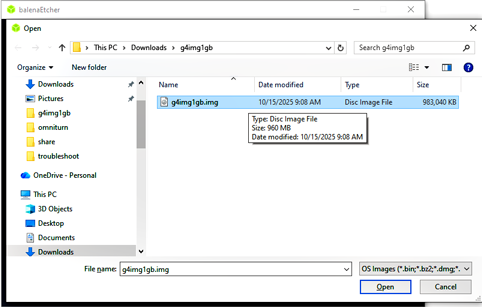
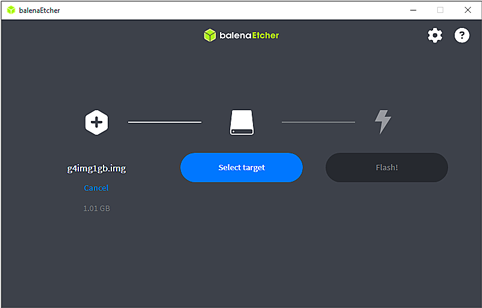
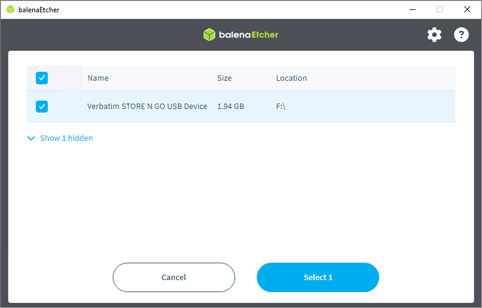
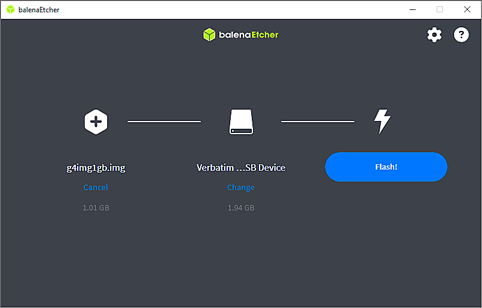
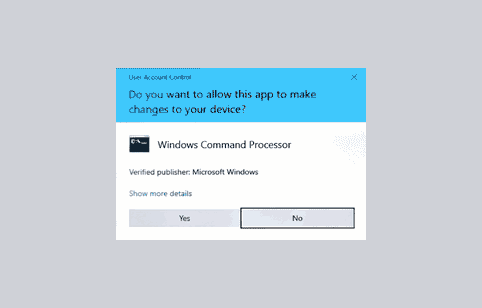
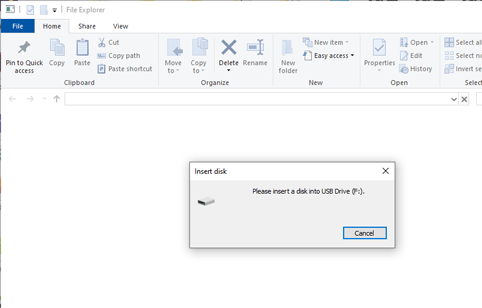
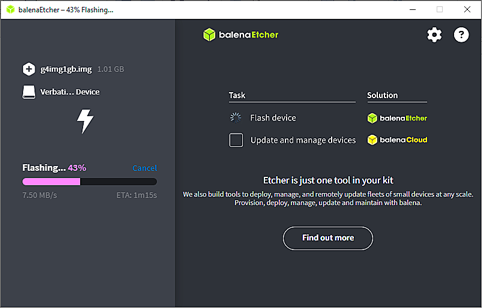
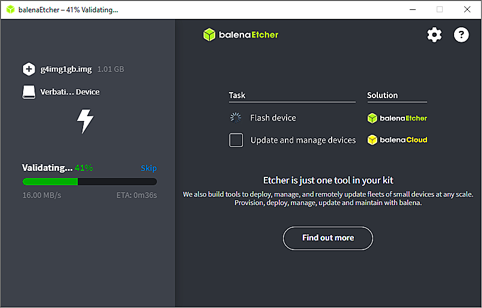
After the disk imaging program is installed, put a thumb drive (at least 1GB: no matter how big it is it will look like a 1GB drive once the image is installed) in your computer. Double-click the BalenaEtcher icon. It will open with "Flash from file" highlighted. Click "Flash from file". Etcher will open an Explorer window: navigate to the g4img1gb folder and select g4img1gb.img, then click "Open". The Etcher main screen will reappear with "Select target" highlighted. Click "Select target": a window will open showing the USB drive to be used. Click the drive and "Select 1" will be highlighted. Click "Select 1". The main Etcher screen will reappear with "Flash!" highlighted; click "Flash!". A User Acccount Control box will appear: click "Yes" to continue. An Insert disk dialog box will appear; ignore it; the flashing takes a few minutes, then the the image will be validated and the "Flash Completed!" screen will appear.
Next, customize the drive for your machine, if necessary. The thumb drive you just created is suitable for the current JetWay motherboard with the standard 5HP spindle drive. If your machine is a C-Axis you must delete the runfiles\filepath.cfg file, and copy either filepath.yas (if you have Yaskawa C-Axis drive) or filepath.bml (if you have Baumuller C-Axis drive) as filepath.cfg.
Instructions to customize the drive are available here.
If your motherboard is NOT JetWay, you must copy the contents of the VIA folder to the root.
Instructions to to this are available here
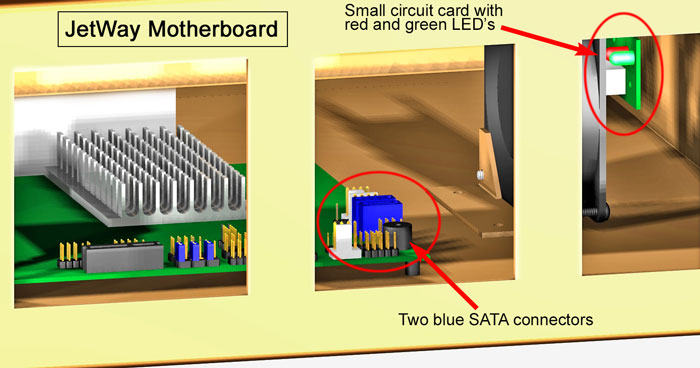
To Identify the JetWay Motherboard
(Better yet, order a replacement thumb drive from the factory.)

Highlight the one you wish to write the image to, then click "Select 1"
Click "Yes" to continue
Pres Esc to clear it
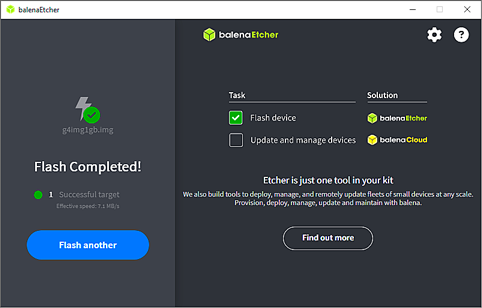
- Balena Etcher disconnects the thumb drive when flashing is completed, so you must first remove and replace the drive to reconnect.
- Next, navigate to the runfiles folder of the thumbdrive, then delete filepath.cfg
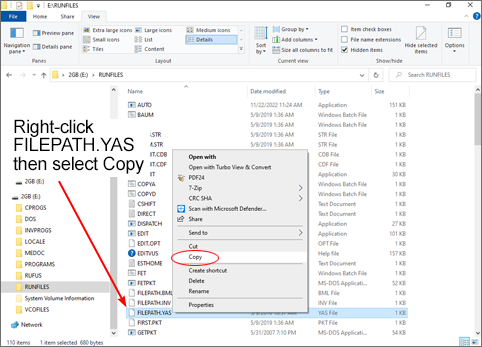
- If you have a Yaskawa C-axis drive, copy filepath.yas as filepath.cfg.
- If you have a Baumuller C-axis, copy filepath.bml as filepath.cfg.
Scroll down for step-by-step details.
If your folder view is set to "Large Icons", it can be difficult to see the files in the RUNFILES folder, so click on the "View" tab, and select "Details".

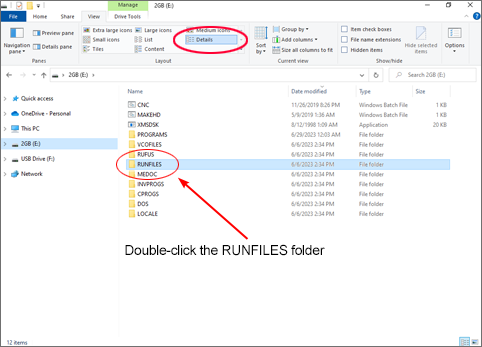
(Note: if your folder view is set to show all extensions, you will see FILEPATH.CFG).
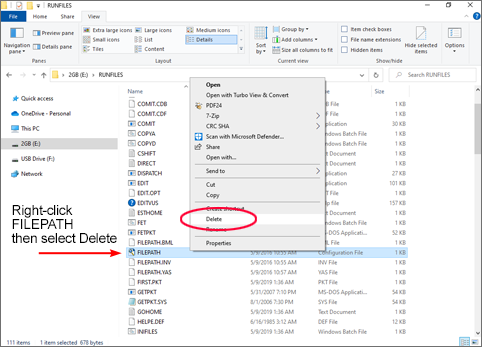
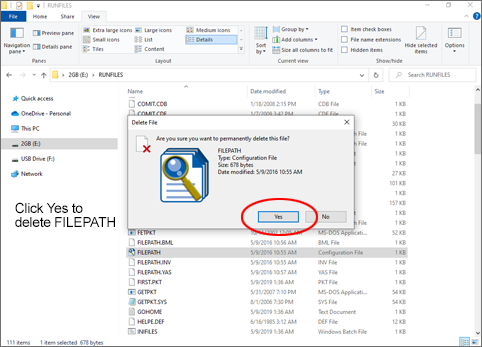
Note: If your C-Axis drive is a Baumuller, right-click on "FILEPATH.BML".
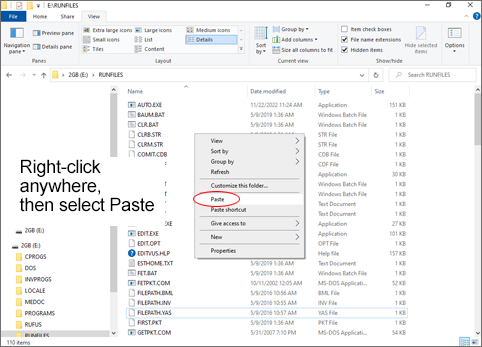
Note: If your C-Axis is a Baumuller, the filename will be FILEPATH ‑ Copy.BML.
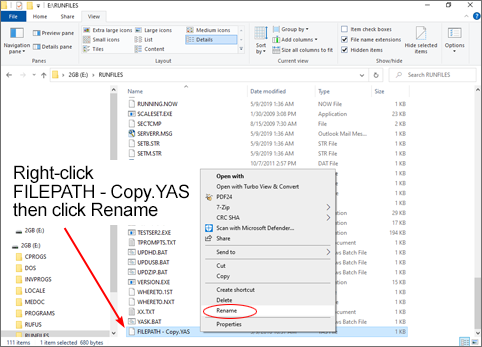
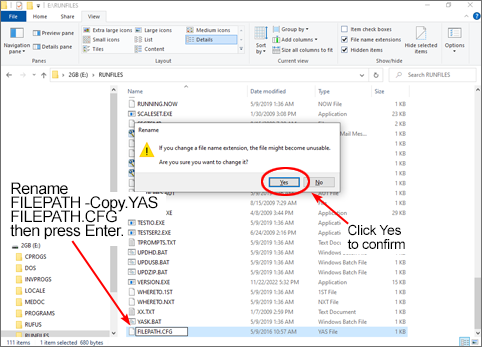
(or FILEPATH ‑ Copy.BML, if Baumuller) as FILEPATH.CFG.
- Drop to DOS (Ctrl-C at Backup Files prompt).
- At K:CNC> prompt, type C: then press Enter.
- At C:\RUNFILES> prompt type CD\ then press Enter..
- At C:> prompt type COPY VIA then press Enter.
- You will be prompted Overwrite C:\AUTOEXEC.BAT? (Yes/No/All):
- Press A for All then press Enter.
- You should see
via\CNC.BAT
via\CONFIG.SYS
3 file(s) copied. - Power down, then power up to reboot.